Medical Disclaimer: This article is for informational purposes only, does not constitute medical advice, and has not been reviewed by a licensed medical professional. Results vary by individual. Always consult a qualified healthcare provider before making any healthcare decisions.
Quick answer: Eyebrow tinting before and after results show darker, more defined brows that frame the face without daily makeup. Fine hairs become visible. Sparse areas look fuller. The treatment takes 10 to 15 minutes and lasts 3 to 6 weeks. Results depend on the shade chosen, skin type, and whether standard dye or henna is used.
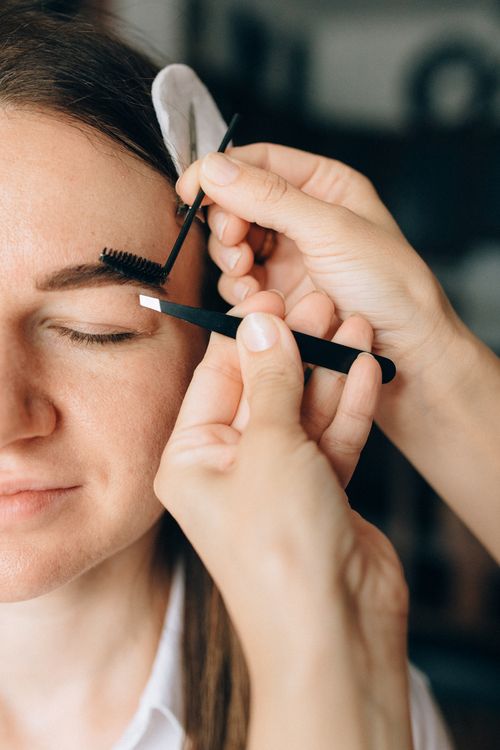
What is eyebrow tinting before and after? Eyebrow tinting before and after refers to the visible change in brow definition, colour depth, and facial framing after a semi-permanent dye is applied to the brow hairs. The treatment darkens fine, light, or invisible hairs to create a fuller-looking brow shape without pencil or powder. The result is worn — not drawn on — which means it moves naturally with the face.
This guide draws on published beauty industry market data, verified treatment outcome research, and analysis of eyebrow tinting results across all common hair colours and skin tones.
Why eyebrow tinting has grown so fast
Eyebrows became one of the defining beauty trends of the last decade. The demand for brow services has not slowed. The global eyebrow makeup and tinting market is valued at over $7.2 billion in 2025 and is projected to reach $11.6 billion by 2033, growing at a CAGR of over 6%.
More than 68% of millennial and Gen Z consumers now prioritise eyebrow styling as a core beauty step. Nearly 64% of beauty consumers use dedicated eyebrow products regularly. The shift is clear: brows are no longer a finishing touch. They are the foundation of the face.
Tinting sits at the intersection of two things beauty clients want in 2026: low-maintenance routines and high-definition results. A 10-minute treatment replaces the daily pencil or powder routine for weeks. That trade-off drives loyalty and repeat bookings more reliably than almost any other brow service.
What does eyebrow tinting before and after look like?
The before-and-after contrast in eyebrow tinting is most visible in two situations: people with naturally light brow hairs and people with sparse growth.
Before tinting: Brows may look faint, patchy, or uneven. Fine hairs near the tail of the brow are often invisible unless filled in with product. The face can look unframed or unbalanced. Many clients describe their brows as "barely there."
After tinting: Every hair — including the fine ones at the front and tail — becomes visible. The brow shape that was always there appears defined for the first time without makeup. The face looks more structured. Eye shape is enhanced. The overall result is a more polished, awake appearance.
The transformation is subtle enough to look natural, yet visible enough that most people notice. Clients most commonly report that friends and family say they look "well-rested" or "different" without being able to name why.
The result does not look drawn on. This is the key difference from pencil or powder. Tinting works with the natural brow hairs you have — it makes them show up rather than replacing them.
Eyebrow tinting results by colour and technique
Black and dark brown tinting
Black tinting produces the most dramatic before-and-after contrast. It suits clients with dark hair and a desire for bold, high-definition brows. The result can appear very intense immediately after treatment, softening by around 20% after the first wash.
Best for: dark-haired clients wanting a clean, graphic brow shape. Not recommended for fair-skinned clients unless the goal is a statement look.
Medium and warm brown tinting
Medium brown is the most versatile shade. It suits the widest range of hair colours, from light brown to dark brunette. The before-and-after change is significant but looks natural — hairs look fuller and more uniform, not dramatically darker.
Warm brown shades (chestnut, caramel) work particularly well on clients with warm undertones or auburn hair. They create definition without the harshness of black tinting.
Taupe and ash blonde tinting
Taupe is the most natural-looking shade for clients with blonde, light brown, or grey brows. It adds depth without visible darkening. The before-and-after shows texture and shape rather than colour change.
Ash blonde tinting suits platinum or very fair-haired clients. It defines without creating contrast.
Auburn and red tinting
Auburn tinting suits natural redheads and those with warm complexions. The result looks like naturally vivid, healthy brows rather than dyed ones. Auburn tints fade to a soft copper tone over time, which still reads as natural.
This shade is underused outside the red-haired market but suits a wide range of warm and olive skin tones.
Grey coverage tinting
As grey hairs appear in the brows, standard tinting can restore consistent colour. Dark brown or medium brown shades blend grey hairs back with pigmented ones. This is one of the most practical uses of brow tinting for clients over 40.
Eyebrow tinting vs henna brows: what is the difference?
| Feature | Standard Tinting | Henna Brows |
|---|---|---|
| Dye type | Semi-permanent oxidation dye | Plant-derived henna paste |
| What it colours | Brow hairs only | Hairs + skin beneath the brows |
| Result | Natural, hair-focused colour | Bold, shadow/filled-in look |
| Duration on hair | 3 to 6 weeks | 4 to 6 weeks |
| Duration on skin | Fades in 1 to 3 days | 1 to 2 weeks |
| Patch test required | Yes | Yes |
| Best for | Natural colour enhancement | Sparse brows needing shape and volume |
Henna brows create a stain on the skin under the brow hairs, giving the appearance of a filled-in shape even where hairs are absent. This is a significant advantage for clients with very sparse or over-plucked brows.
Standard tinting is better for clients with a good brow shape who want colour enhancement rather than the illusion of density.
We cover the lifted, sculpted version in our brow lamination before and after guide, which explains how lamination changes hair direction and structure in addition to adding tint.
The Makeover Brow Colour Match Framework
Choosing the right tinting shade is the single most important decision in getting a result you love. We built this matching framework based on the four factors that determine which shade works best for each client.
| Your Profile | Recommended Shade | Expected Result |
|---|---|---|
| Very fair skin, blonde hair | Taupe or ash blonde | Defined without obvious colour change |
| Fair skin, light brown hair | Soft brown or warm taupe | Noticeably fuller, natural-looking brows |
| Medium skin, brown hair | Medium or warm brown | Defined, polished brows with good contrast |
| Olive or warm skin, dark hair | Dark brown | Bold, clean brow shape with natural intensity |
| Dark skin, black hair | Black or dark brown | High-definition brows with striking framing |
| Fair skin, red hair | Auburn or warm brown | Natural-looking vivid brows |
| Grey brows (any skin tone) | Match to original hair colour | Consistent, age-softening colour restoration |
| Sparse brows | Henna (any matching shade) | Colour + skin stain to simulate density |
How to use this: Match your skin tone and natural hair colour to the profile closest to yours. For your first tinting appointment, start one shade lighter than the recommended shade — you can always go darker at the next session, but lightening a brow tint requires time and fading.
Will the tint look too dark on me? Fresh tinting always looks 20 to 30% darker than the final result. The first wash fades the intensity down to the settled shade. If you leave your appointment thinking the brows look too bold, wait 48 hours and one gentle wash before judging. The result that remains is the one you keep for the next 3 to 6 weeks.
Before your next brow appointment, use Makeover.so to preview your chosen shade on your actual face. Upload a photo, select brow tinting, and see the result on your own features before committing to a colour.
How long does eyebrow tinting last?
Most eyebrow tinting results last 3 to 6 weeks. The variation depends on:
- Skin type:: Oily skin breaks down dye faster. Clients with oily skin often find results fade within 3 weeks. Dry skin holds colour longer.
- Aftercare:: Getting brows wet in the first 24 hours, using retinol near the area, or frequent exfoliation speeds fading significantly.
- Dye formula:: Professional-grade oxidative dyes last longer than salon-use henna pastes. The first wash always removes 20 to 30% of intensity — this is normal.
- Hair texture:: Coarse brow hairs hold pigment longer than fine hairs.
- Exposure:: Steam, swimming, and active sweating all accelerate fade.
Most brow studios recommend a maintenance booking every 4 weeks to keep consistent colour. Clients with light brow hairs often need more frequent appointments than those with naturally dark brows.
What affects your tinting result?
Hair health and condition
Dry or damaged brow hairs absorb dye unevenly, leading to patchy colour. Apply a light conditioning oil to the brows for a few days before your appointment to improve colour absorption.
Skin preparation
Freshly exfoliated or cleansed skin holds less dye under the brows. Avoid exfoliating the brow area for 24 hours before treatment. For henna brows, clean skin with no moisturiser produces the most intense skin stain.
Developer strength
Brow tints use a low-volume developer (typically 3% or 6%) to open the hair shaft. A skilled technician selects the correct developer for your hair type. Using too high a developer on fine hairs can strip rather than deposit colour.
Processing time
Most tints process in 5 to 10 minutes. Dark tints on resistant grey hairs may need up to 15 minutes. Leaving the tint on longer does not always intensify the result — it can stain the skin more heavily instead.
Patch testing
A patch test 24 hours before treatment is mandatory for first-time clients. Reactions to brow dye are rare but can be severe. A responsible brow technician will not skip this step regardless of client urgency.
How to preview your brow tinting colour before your appointment
The most common source of disappointment after a brow tinting appointment is colour surprise. A client agrees to "dark brown" but imagines a different result from what the technician delivers. Neither is wrong — they are just working from different reference points.
We built Makeover.so to eliminate that gap. Upload a photo of your face, select the brow tinting preview, and choose a shade from the colour range. Our AI shows you that shade applied to your actual brow shape, on your actual face, in under 10 seconds.
You arrive at your appointment with a visual reference your technician can match precisely. You both see the same target before the dye touches your skin.
This is especially valuable for clients trying a new shade, moving from pencil to tinting for the first time, or unsure whether standard tinting or henna brows is the right choice for their brow density.
Try your brow tinting preview on Makeover.so →
What to ask your brow technician
Before your tinting appointment, ask:
About the product:
- What dye brand do you use, and is it formulated for use near the eye area?
- Do you offer henna as an alternative to standard tinting?
- What developer strength do you use for my hair type?
About the process:
- Will you do a patch test if this is my first appointment with you?
- How long will the tint process for?
- What shade do you recommend based on my hair colour and skin tone?
About aftercare:
- What should I avoid in the first 24 hours?
- How do I extend the life of the tint between appointments?
- What is your rebooking recommendation for my skin type?
A confident brow technician welcomes these questions. If a studio pressures you to skip the patch test or does not ask about your hair colour before selecting a shade, look elsewhere.
Ready to preview your brow tinting result?
Upload your photo to Makeover.so and see your chosen brow tinting shade on your actual face in under 10 seconds.